How to Remove Window Tint: A Step-by-Step Guide
How to Remove Window Tint? Window tinting is a popular way to improve the appearance of your vehicle or home, while also reducing glare and heat. However, over time, window tint can start to peel, bubble, or fade, making it necessary to remove and replace. Removing window tint can be a difficult and time-consuming process, but with the right tools and techniques, it can be done quickly and easily. In this article, we’ll show you how to remove window tint from your car or home windows in a few simple steps.
Introduction How to Remove Window Tint
Before we begin, it’s important to understand that removing window tint can be a messy and time-consuming process. However, with a little patience and the right tools, you can remove old window tint and restore your windows to their original appearance. In this article, we’ll show you how to remove window tint from your car or home windows using a few simple steps.
Tools You’ll Need How to Remove Window Tint
- Heat gun or hairdryer
- Razor blade or scraper
- Spray bottle filled with water and dish soap
- Paper towels or cloth
- Plastic sheet or garbage bag
- Goggles and gloves (optional)
Preparing the Window
Before you begin removing the window tint, it’s important to prepare the window properly. Start by cleaning the window with a mixture of water and dish soap to remove any dirt, dust, or debris. Then, cover the window with a plastic sheet or garbage bag to protect the surrounding areas from damage or overspray.

Removing the Tint with Heat: How to Remove Window Tint
One of the most effective ways to remove window tint is by using heat. To do this, use a heat gun or hairdryer to heat the tint for several minutes until it becomes soft and pliable. Then, use a razor blade or scraper to peel off the tint starting from the corner of the window. Be sure to apply enough heat to soften the adhesive and avoid damaging the glass.
Removing the Adhesive Residue
Once you have removed the tint, there may be some adhesive residue left on the window. To remove this, spray the window with a mixture of water and dish soap and let it soak for several minutes. Then, use a razor blade or scraper to gently scrape off the adhesive, being careful not to scratch the glass. You can also use a commercial adhesive remover if the residue is particularly stubborn.
Cleaning the Window
After you have removed the tint and adhesive residue, it’s important to clean the window thoroughly. Use a mixture of water and dish soap to remove any remaining residue or dirt. Then, dry the window with a clean cloth or paper towel.
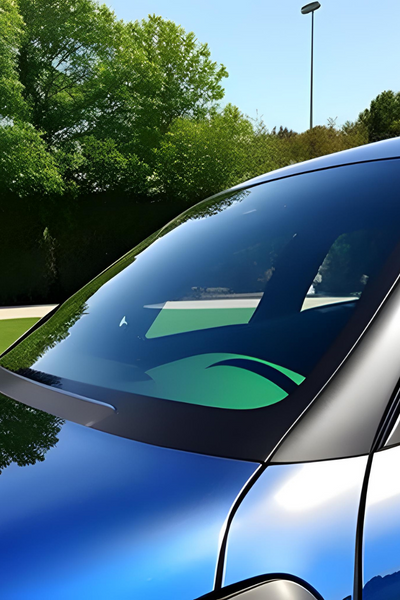
Removing Tint from Car Windows
Removing window tint from car windows can be slightly more difficult than removing it from home windows due to the curvature of the glass. To make the process easier, use a heat gun or hairdryer to heat the tint from the outside of the car, then use a razor blade or scraper to remove it from the inside.
Removing Tint from Home Windows
Removing window tint from home windows is generally easier than removing it from car windows due to the flatness of the glass. However, the process is still the same. Use a heat gun or hairdryer to soften the tint, then use a razor blade or scraper to remove it from the glass.
Tips and Tricks: How to Remove Window Tint
- If you don’t have a heat gun or hairdryer, you can also use the sun to soften the tint by parking your car in direct sunlight for several hours.
- For stubborn adhesive residue, you can try using a mixture of rubbing alcohol and water to break down the adhesive.
- If you’re having trouble getting the tint to peel off, you can try using a plastic card or credit card to gently scrape it off.
Safety Precautions
When removing window tint, it’s important to take some safety precautions to protect yourself and the surrounding areas. Here are some tips to keep in mind:
- Wear goggles and gloves to protect your eyes and hands from heat and adhesive residue.
- Keep a fire extinguisher nearby in case of a fire.
- Work in a well-ventilated area to avoid inhaling fumes from the adhesive.
- Avoid using sharp tools near the edges of the glass to prevent cracking or chipping.
Common Mistakes to Avoid: How to Remove Window Tint
When removing window tint, there are some common mistakes that you should avoid to prevent damage to your windows. Here are some of the most common mistakes to watch out for:
- Using too much force when scraping the tint, which can scratch or crack the glass.
- Using a tool that is too sharp, which can damage the glass.
- Not heating the tint enough, which can make it difficult to peel off.
- Using too much water when cleaning the window, which can cause water spots or streaks.
Conclusion
Removing window tint can be a time-consuming and messy process, but with the right tools and techniques, it can be done quickly and easily. By following the steps outlined in this article, you can remove old window tint from your car or home windows and restore them to their original appearance.
FAQs
- Will removing window tint damage my windows?
No, if you use the right tools and techniques, removing window tint should not damage your windows.
- How long does it take to remove window tint?
The amount of time it takes to remove window tint will depend on the size of the window and the type of tint you’re removing. However, it usually takes a few hours to complete the process.
- Can I remove window tint myself or should I hire a professional?
You can remove window tint yourself if you have the right tools and are comfortable working with heat and adhesive. However, if you’re not comfortable doing it yourself, it’s best to hire a professional.
- Can I reuse the old tint?
No, once you have removed the tint, it cannot be reused.
- Do I need to remove the tint from all of my windows at the same time?
No, you can remove the tint from one window at a time if you prefer.